You can access the OxBlue Interface from your web browser or the mobile app. If you have multiple cameras, images of all your construction sites are displayed in a grid. If you have a single camera, your camera will be automatically displayed.
Note: Depending on how many cameras you have or what features you have enabled, your dashboard may look different from the screenshots shown.
View Multiple Sites
You can display the images in a list or on a map by choosing the appropriate option in the upper left corner of the Dashboard (View List or Map).
You can display only some of the sites by using the Filter or Search options.

The cameras photograph the site at regular intervals, so you can:
- Get a closer view by adjusting the browser to its full size, or pan and zoom into the image.
- Scroll forward or backward through the camera’s images, either by date or through each individual image.
- Compare two images of the site taken at different times.
- Download an image and mark it up, share it with a colleague by email or social media and attach a comment.
- Create a time-lapse video of the site over a period of time, download it, or send it to a colleague with comments.
Note: To view multiple projects, you must have multiple OxBlue cameras.
View Sites as a Grid
The default view for the Navigation Menu Area is the Grid View. The most recent image from each site is displayed in a rectangular grid.
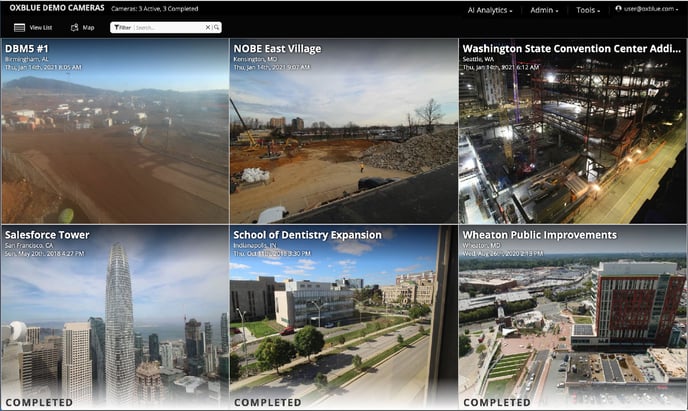
Note: Projects organized by either Active or Completed, then are listed in alphabetical order.
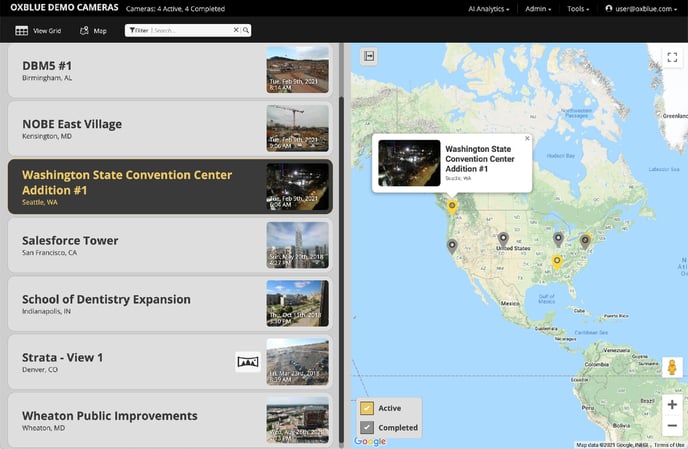
View Sites as a List
To display sites as a list, click View List.
Note: Projects organized by either Active or Completed, then are listed in alphabetical order.
The default view is divided in half, with the left side displaying a list of sites and the right side displaying the site location.
To see the site in more detail, click the thumbnail. To return to the list view, either click the back button on your browser or click Change View in the menu.
On the map, each site is shown with a red marker icon. The map automatically zooms in to focus on all sites, so if all cameras are in one state, the map will only show one state. If they're across the country, the map shows the entire country.
Sites are denoted as Active or Completed. Active sites are shown in yellow while completed sites are grey.
Map Controls:
- To display the site's name and location, hover over its marker.
- To display only active sites, uncheck Complete in the lower-left map corner.
- To display only completed sites, uncheck Active in the lower-left map corner.
- To zoom in and out, use the + and - controls in the lower-right map corner.
- To maneuver around, click and hold the left mouse button and move your cursor. It should show up as a hand icon.
- To hide the map, click the arrow icon ↦ in the upper-left map corner. The list will then occupy the entire window.
- To unhide the map, click the arrow icon ↤ in the upper-right list corner.
- To display the map in fullscreen mode, click the square icon ⛶ in the upper-right map corner. To exit fullscreen mode, press the esc. key or click the inverted corners symbol ╬ in the upper-right map corner.
- To switch to Google Street View, drag the man icon 🚹 onto the map.
Note: Street View is useful for identifying the best route to a site, especially for oversized vehicles
- To return to the grid, click View Grid.
View Sites on the Map
To display sites on a map, click the Map button.

On the map, each site is shown with a red marker icon. The map automatically zooms in to focus on all sites, so if all cameras are in one state, the map will only show one state. If they're across the country, the map shows the entire country.
Sites are denoted as Active or Completed. Active sites are shown in yellow while completed sites are grey.
Map Controls:
- To display the site's name and location, hover over its marker.
- To display only active sites, uncheck Complete in the lower-left map corner.
- To display only completed sites, uncheck Active in the lower-left map corner.
- To zoom in and out, use the + and - controls in the lower-right map corner.
- To maneuver around, click and hold the left mouse button and move your cursor. It should show up as a hand icon.
- To switch to Google Street View, drag the man icon 🚹 onto the map.
Note: Street View is useful for identifying the best route to a site, especially for oversized vehicles
- To return to the dashboard, click Back to Dashboard.
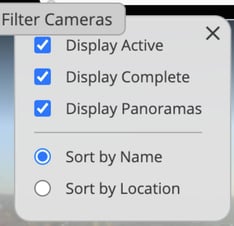
Search and Filter the Sites
To display only certain sites, click Search and enter your criteria. As you type, the view will change to show matching site names or locations.
You can also filter your sites using the Filter menu. Just click the funnel icon and fill in the fields.
View an Individual Site
If you have a single camera, the individual site will display its most recent image automatically.
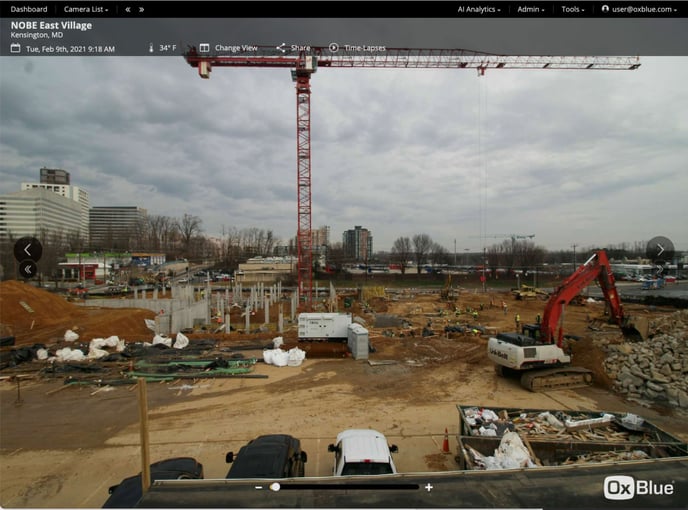
The site name, location, timestamp and temperature of the site are displayed in the upper left corner. If a more recent shot is available, an icon saying "New Image Available" is displayed above the image. Clicking the icon will jump to the new image.

You can also click Change View to choose a new display.
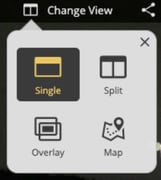
Split View
Click Split to compare your most recent site image and another of your choosing.
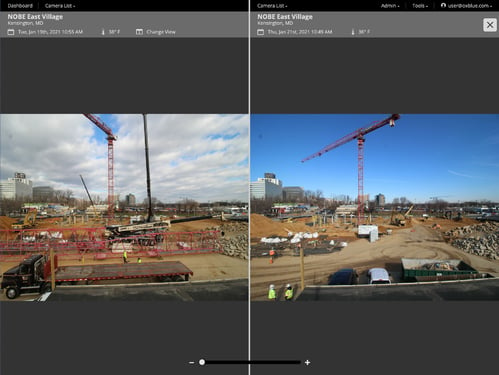
Click the calendar icon to change the date and time of either image.
Click the X in the top right corner to exit this view.
Overlay View
Click Overlay View to lay images on top of one another for easy comparison.
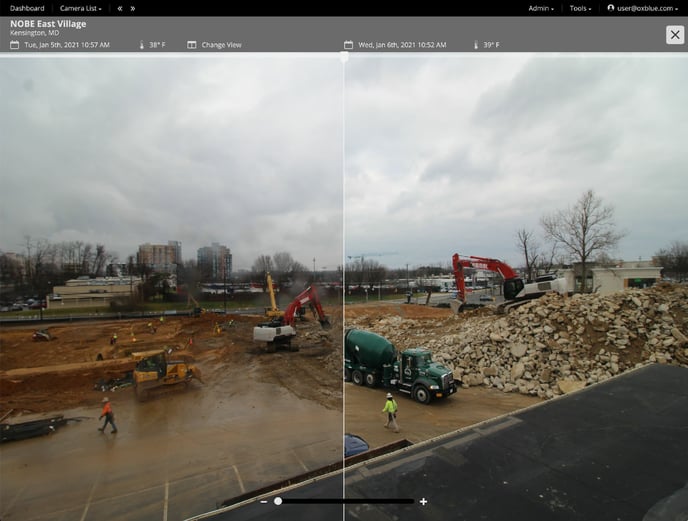
Move the slider in the center of the image to compare progress.
Click the calendar icon to change the date and time of either image.
Click the X in the top right corner to exit this view.
Map View
Click Map to display a Google map with your jobsite tagged.
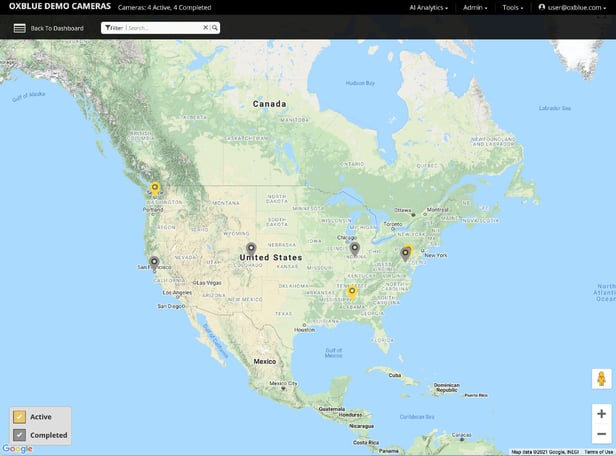
On the map, each site is shown with a red marker icon. The map automatically zooms in to focus on all sites, so if all cameras are in one state, the map will only show one state. If they're across the country, the map shows the entire country. A single site will be zoomed in to show the immediate area.
Sites are denoted as Active or Completed. Active sites are shown in yellow while completed sites are grey.
Map Controls:
- To display the site's name and location, hover over its marker.
- To display only active sites, uncheck Complete in the lower-left map corner.
- To display only completed sites, uncheck Active in the lower-left map corner.
- To zoom in and out, use the + and - controls in the lower-right map corner.
- To maneuver around, click and hold the left mouse button and move your cursor. It should show up as a hand icon.
- To switch to Google Street View, drag the man icon 🚹 onto the map.