There are multiple ways to view or create time-lapse videos of your jobsite:
- Automatic
- Custom
- Scheduled
- Professional
Standard Time-lapses
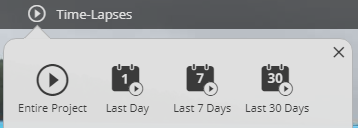
Click Time-Lapses and choose one of the menu options:
- Entire Project — Generates a time-lapse video of the entire project
- Last Day — Generates a time-lapse video of the last day
- Last 7 Days — Generates a time-lapse video of the last week
- Last 30 Days — Generates a time-lapse video of the last month
Once generated, the standard time-lapse will play in the interface. A small menu will appear:

Download the video by clicking the download arrow ⭳.
Adjust the video speed by clicking the speedometer button and toggling the points.
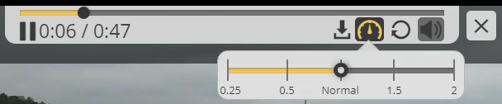
Click the circular arrow ↻ to replay the time-lapse.
Change the volume by clicking the speaker icon 🔊.
Note: Each standard time-lapse video is 30 seconds long
Custom Time-Lapses
Note: Only users and admins are able to create custom time-lapses.
Click Time-Lapses, then select Create Custom Time-Lapse from the dropdown menu.
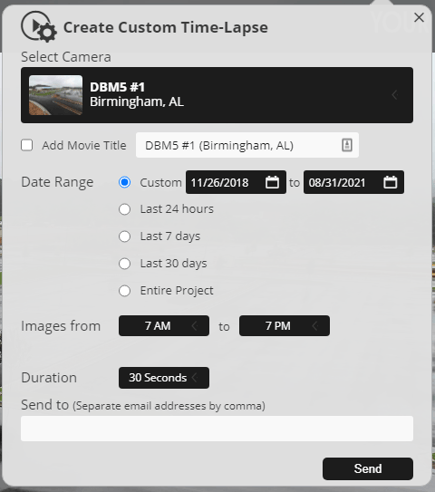
A title is automatically generated based on the camera name, but it's possible to add your own next to Add Movie Title.
Choose your time-lapse timeline with Date Range. Either choose one of the default options (Last 24 Hours, Last 7 Days, Last 30 Days or the Entire Project) or select Custom to choose your own dates.
Select either a default time range or specify your own with Images From.
Customize the time-lapse duration to either 15 Seconds, 30 Seconds, 45 Seconds or 60 Seconds under Duration.
Add video recipients with Send To. You can send videos to multiple emails by separating them with a comma.
Finally, click Send.
Note: It may take up to an hour for your customized time-lapse to arrive in your inbox.
Scheduled Updates
Create automatically scheduled images and time-lapses by clicking Time-Lapse and Scheduled
Updates.
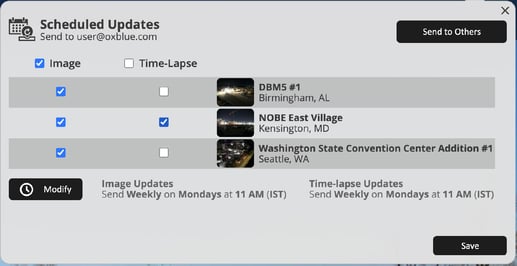
To send images, either check Image to select all sites or check individual sites. To send time-lapses, either check Time-Lapse to select all sites or check individual sites.
To edit the schedule, click Modify. A new menu will appear:
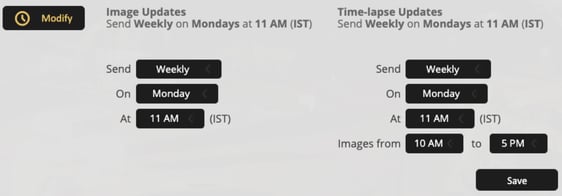
After changing the schedule, click Save to return to the main scheduling menu.
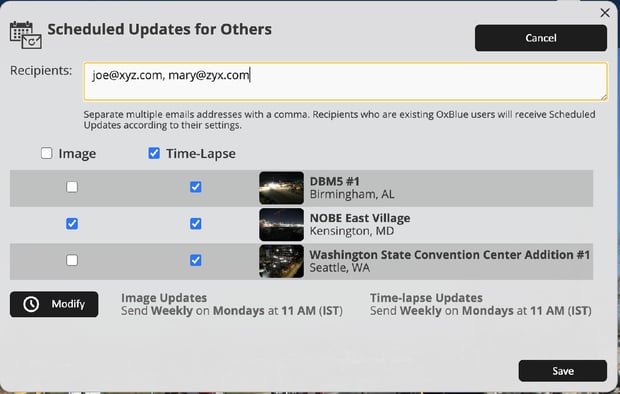
To add other recipients, click Send to Others. In Recipients, enter the email addresses, separating multiple with commas.
Once you've customized the settings, click Save to begin receiving scheduled updates.
Note: It's possible to set up multiple scheduled updates at a time.
Professional Time-Lapses
To order a professionally produced time-lapse video, click Time-Lapses and Order Professional Time-lapse. A new window will pop up with a video order form.