How do I install my Cobalt Series camera?
Your client support manager will be the primary contact for technical support. The team is available at 888.849.2583 (Monday - Friday, 9 am - 5 pm EST).
Note: Save the box and foam for returning your camera at the end of the project. The return label is included.
Complete these steps before installation:

Connect your unit to a power source and verify the blue light on the bottom of the camera is on. If using solar, hook up the battery & connect the camera to the cabinet.
Turn the breakers on. Verify the blue light on the bottom of the camera is on.

Ten minutes after connecting your camera to power, call 888.849.2583 (Monday - Friday, 9 am - 5 pm EST) to confirm image transmission and activation. Have your camera ID (located on the front cover) ready.
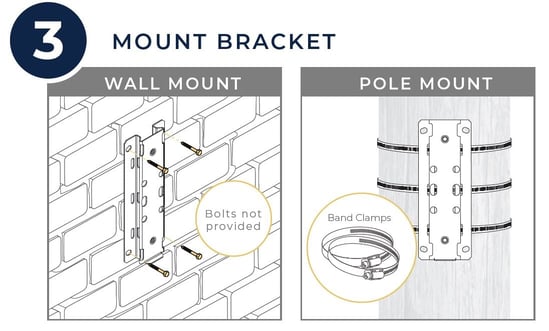
Install the quick connect bracket to your preferred mounting substrate.
Installation Tips:
- Ensure your camera is level.
- The camera has a field view of up to 97°.
- Place the camera outside of the construction area to capture maximum activity.
- The ideal area to mount a camera is in a corner.
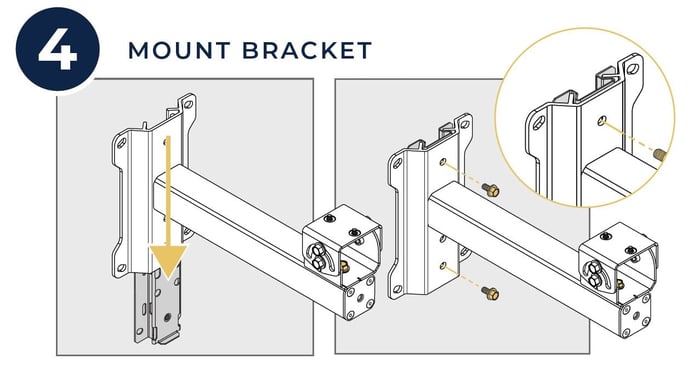
Slide the universal mount base onto the quick connect bracket and secure it using the two bolts on the mount.
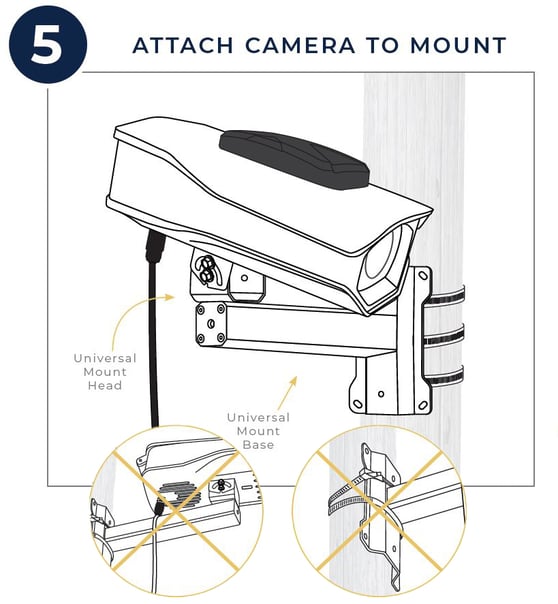
Attach the camera to mount the head using the screws on the base of your
camera.
- Adjust camera direction by rotating the mount head at the end of the universal mount base; tighten the bolt to hold the position.
- Adjust camera angle by loosening the four bolts on the sides of the mount head and pivot along channel tracks; tighten bolts to the position.
- Make sure the power cable isn’t tweaked against the universal mount. If stained, point the mount in a different direction and adjust the camera angle as shown in
diagram 5.
Optional Tether Installation
In areas where there is the risk of a falling camera causing injury or significant damage, a 1/32” wire rope with a minimum 150 lb breaking strength is recommended to be installed separately to the camera and camera mount, and then back to the structural support. For tether equipment, contact your client support manager.
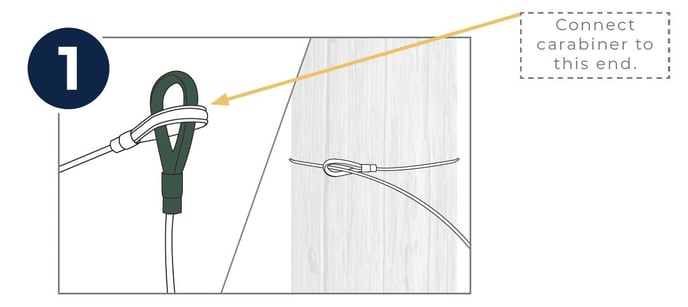
Loop the tether cable around the pole and feed the green pool into the other.
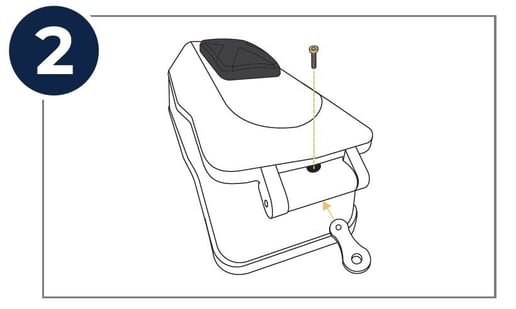
Connect the anchor to the unit.
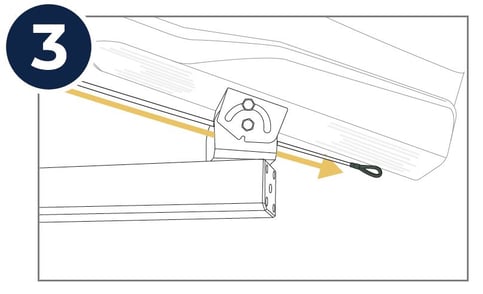
Loop the tether through the mount.
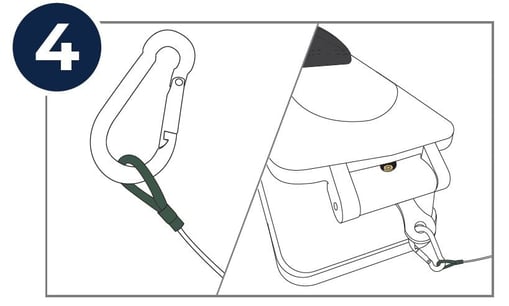
Connect the tether to the camera with the carabiner.
Note: It is the contractor's responsibility to meet all code requirements, and to obtain any and all permits necessary.
![OxBlue_tag_white_200.png]](https://knowledge.oxblue.com/hs-fs/hubfs/OxBlue_tag_white_200.png?height=50&name=OxBlue_tag_white_200.png)