Your client support manager will be the primary contact for technical support. The team is available at 888.849.2583 (Monday - Friday, 9 am - 5 pm EST).
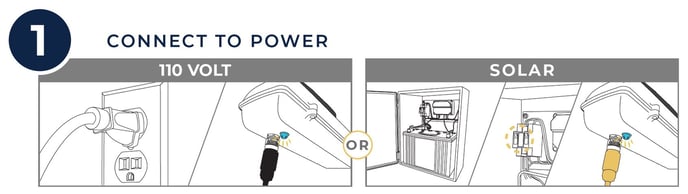
Connect your unit to a power source and verify the blue light on the bottom of the camera is on. If using solar, hook up the battery & connect the camera to the cabinet.
Turn the breakers on. Verify the blue light on the bottom of the camera is on.
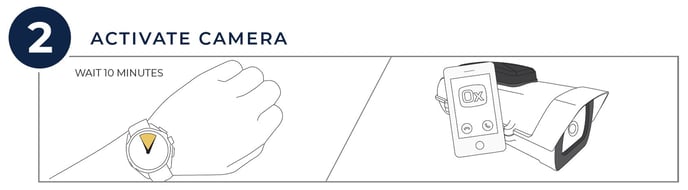
Ten minutes after connecting your camera to power, call 888.849.2583 (Monday - Friday, 9 am - 5 pm EST) to confirm image transmission and activation. Have your camera ID (located on the front cover) ready.
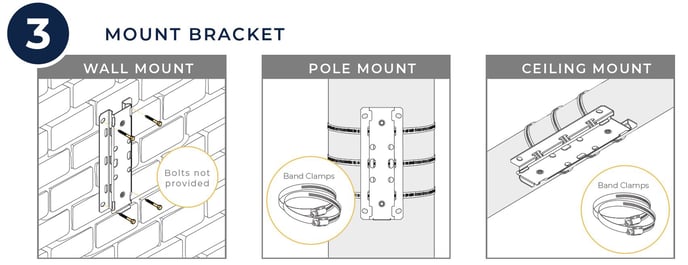
Install the quick connect bracket to your preferred mounting substrate.
Installation Tips:
- The Indigo Series is for interior use.
- Ensure your camera is level.
- The camera has a field of view up to 170°.
- Place the camera outside of the construction area to capture maximum activity.
- The ideal area to mount a camera is in a corner.
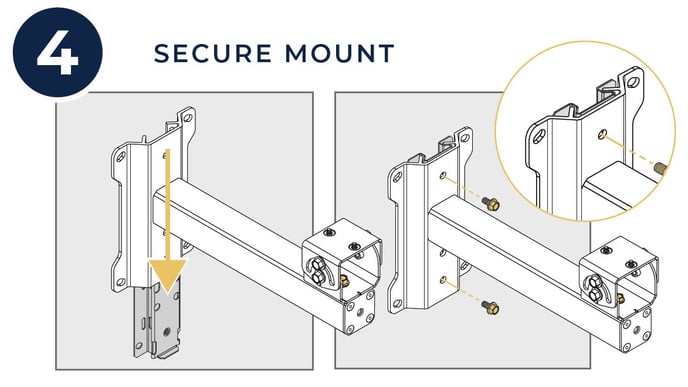
Slide the universal mount base onto the quick connect bracket and secure it using the two bolts on the mount.
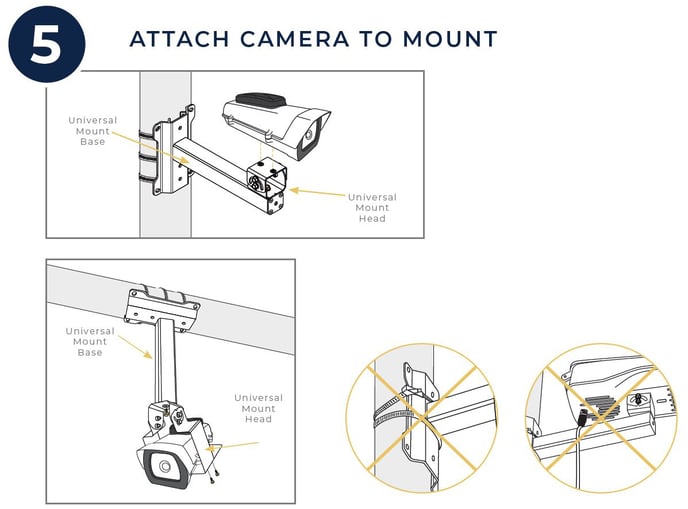
Attach the camera to the mount head using the screws on the base of your camera.
- Adjust the camera direction by rotating the mount head at the end of the universal mount base; tighten the bolt to hold the position.
- Adjust the camera angle by loosening the four bolts on the dies of the mount head and pivot along channel tracks; tighten the bolts to secure the position.
- Make sure the power cable isn't tweaked against the universal mount. If stained, point the mount in a different direction and adjust the camera angle.
Interior Post Mount
Build your own portable interior camera mount for less than $20 and ensure that you’re always capturing the best view of your job site.
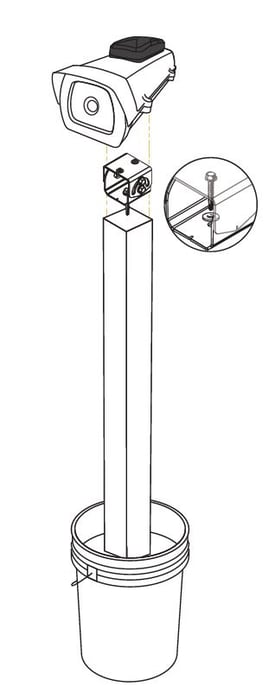
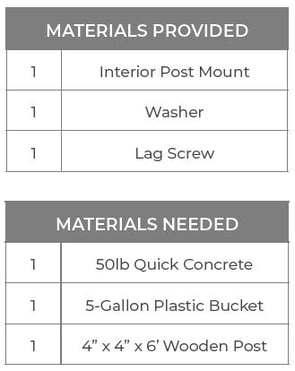
- Empty quick-setting concrete into a 5-gallon bucket and mix by following the concrete’s instructions.
- Position a wooden post in the center of the concrete bucket.
- Allow the concrete to set.
- Attach the interior mount to the post using the washer and lag screw provided.
- Attach the camera to the mount and confirm the position with Client Support.
Note: It is the contractor's responsibility to meet all code requirements, and to obtain any and all permits necessary.