Notifications automatically send alerts when certain activity, safety and weather conditions occur onsite. As of February 8th, 2023 we've also added equipment notifications to generate alerts when equipment like bulldozers or cement trucks are seen moving onsite.
Note: Artificial intelligence must be turned on for notifications to work. If you do not have AI enabled, please contact your client support representative.
Tip: Notifications can be created from the OxBlue interface or in the User Settings Page (OxBlue Interface > Top-right person Icon > Settings) under Notifications Management.
There is no difference in the notifications and functionality whether they are created from the Interface or User Settings page, however User Settings > Notifications Management is where to go to edit or delete existing notifications.
To create a notification from the interface, start by click the bell in the navigation bar and select Create Notification to begin set-up.

Choose the notification type (activity, safety, weather or equipment), days to monitor and other related notification criteria.
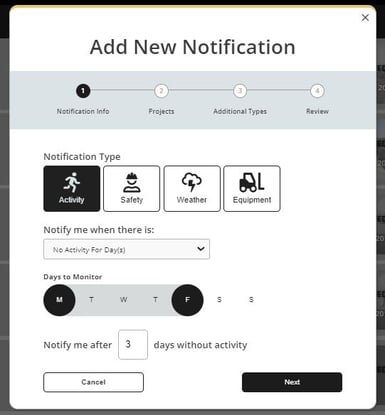
Then select the projects you wish to monitor from the drop-down menu.

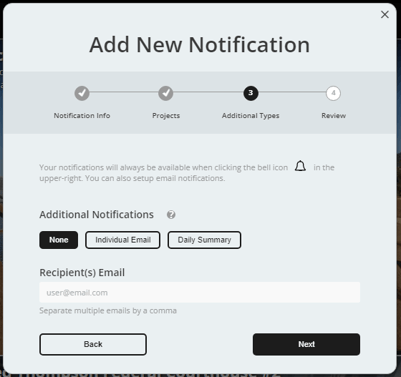
Add email notifications and daily summaries by selecting either option and providing designated email addresses. Click Next and Add Notification to complete the process.

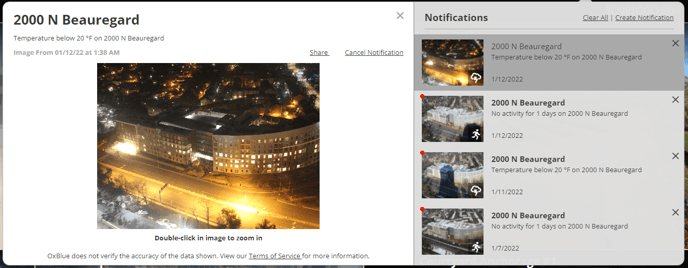
To view notifications, click the bell. They will be listed in the drop-down menu.
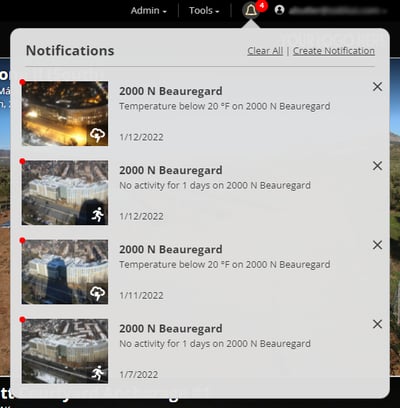
Choose any image to review notifications in further detail, and double-click to zoom in. Click Share to email the image to stakeholders, or click Cancel Notification to delete the alert.
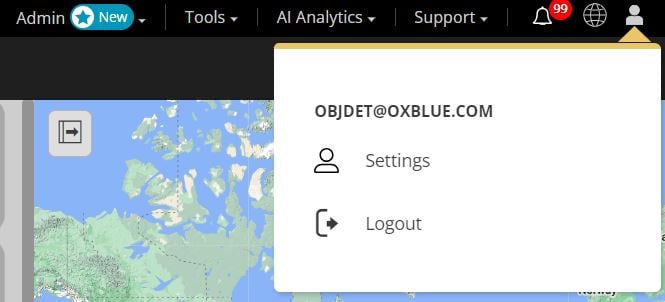
To create a notification from your User Settings page, start by navigating to the User Settings page by clicking the person icon located at the top-right of your OxBlue interface and click Settings.
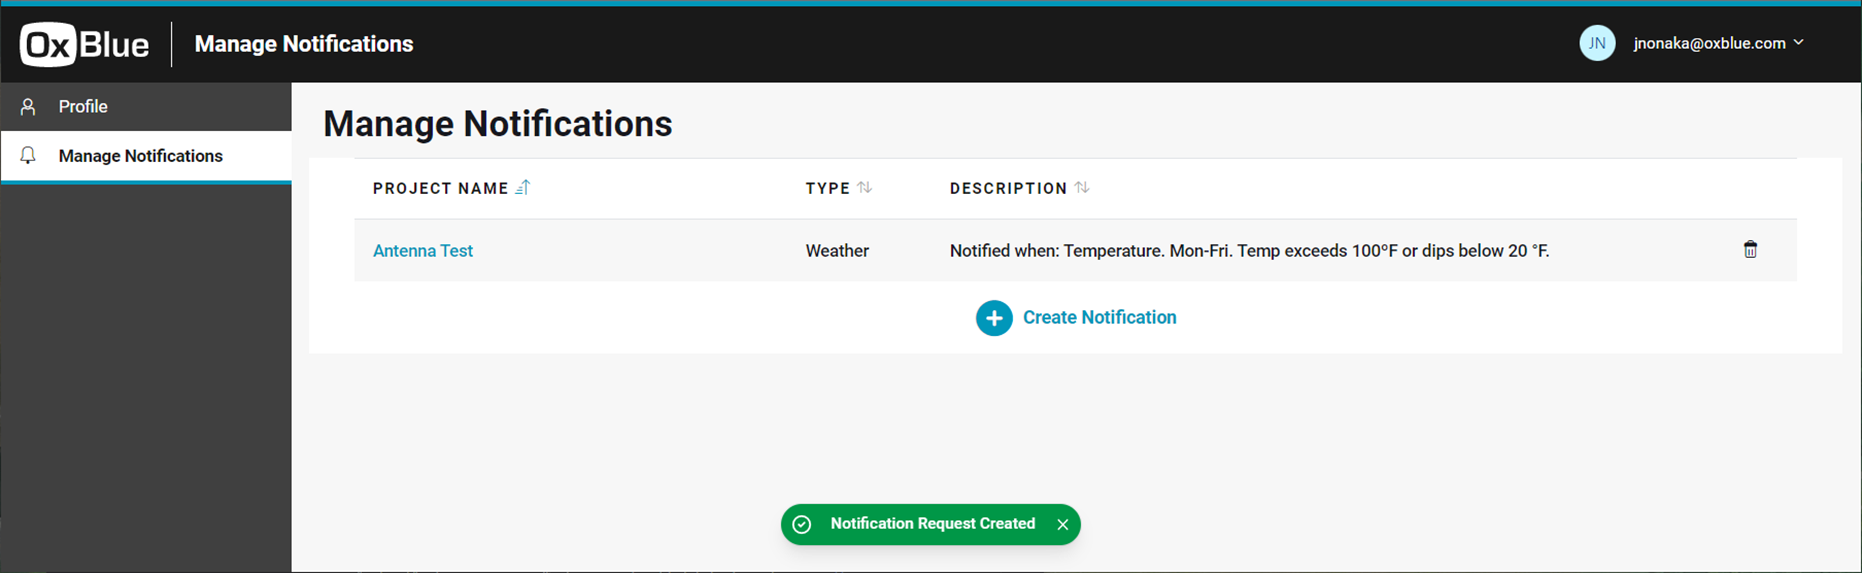
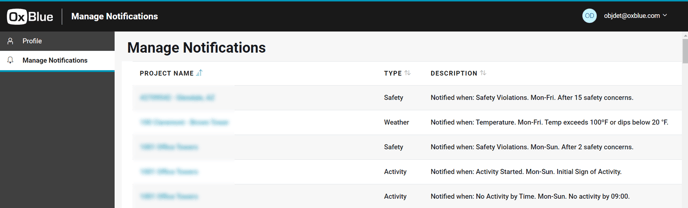
Next, click Manage Notifications. At the bottom of the page, you'll see the icon to Create a Notification. If you have existing notifications (whether you've created them from the Interface or the User Settings Page), you'll see them here and you can edit or delete them on this page.
Just like creating a notification from the Interface, select your project, notification type, and the delivery method of the notification. Once you've got those details entered, you can save your notification.
If the Save box is greyed out and you're having trouble saving, check the error messages displayed in red to see what needs to be fixed.
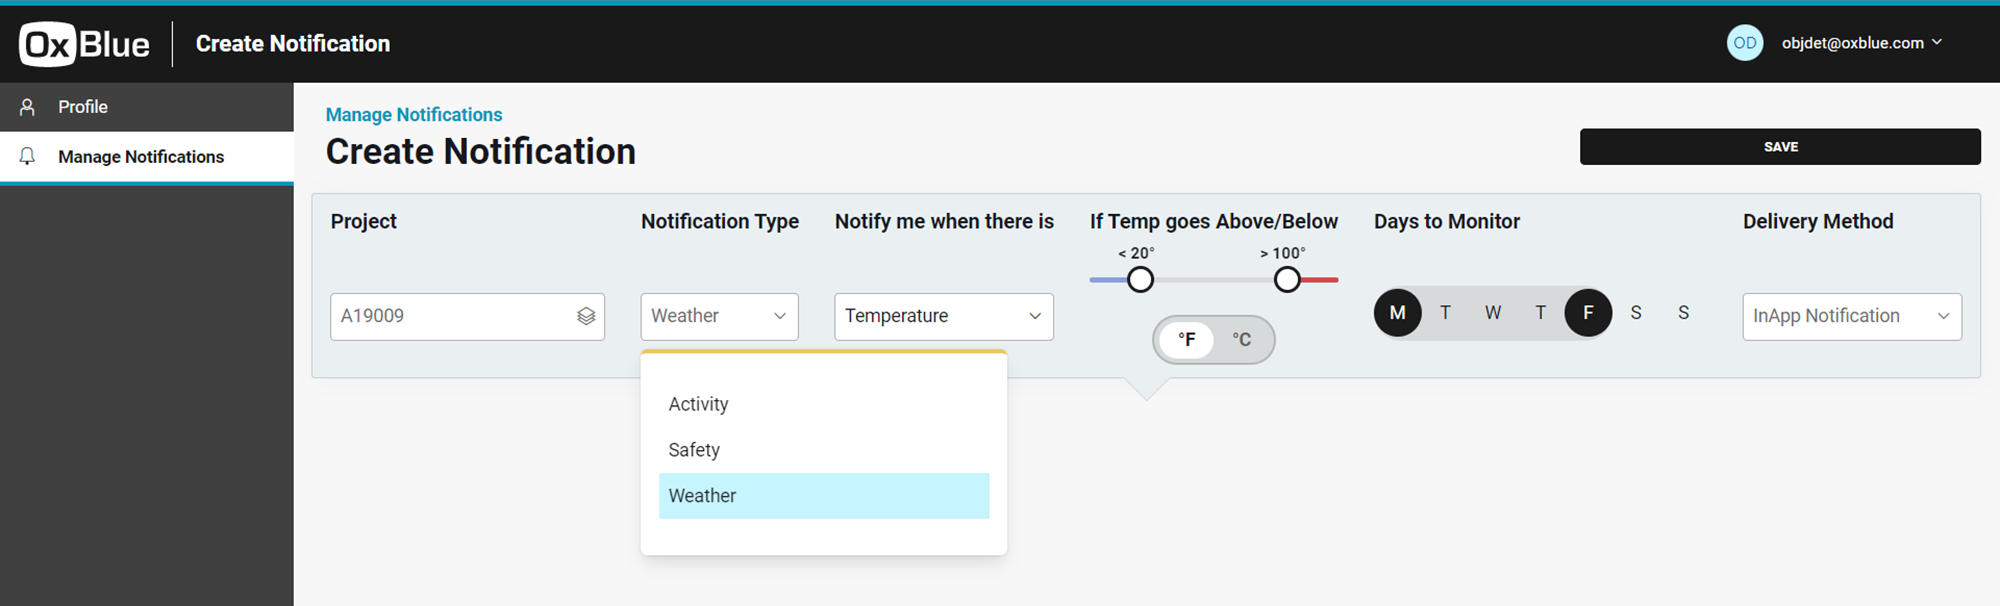
Once saved, you'll see a green pop-up at the bottom to confirm that you've successfully created your notification.
Note that there is no difference in the notifications and functionality whether they are created from the Interface or User Settings page, and you'll see all active notifications that you've created regardless of where they were created from.