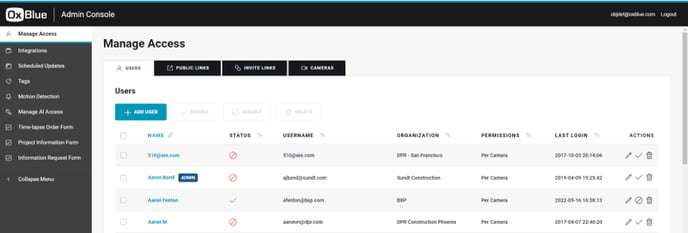
To manage your camera's users, click Manage Access in the admin console.
Add a New User
To add a new user, click Add User and fill in the fields on the screen and click Save. The Edit User screen will appear next. Select all associated cameras and click Save again.
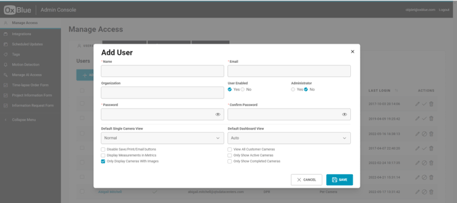
- Name —– Enter the user’s full name.
- Email — Enter the user’s email address.
- Organization — Enter the name of the user’s organization.
- User Enabled — This item is checked by default.
- Administrator — Check if the user is an administrator, that is, a user who is authorized to create and edit other users. Every customer must have at least one administrator.
- Password — Enter a password for the user.
- Confirm Password — Enter the password again.
- Default Single Camera View — Select from the dropdown menu the view (Normal, Split, Overlay, or Timelapse) that will be displayed first. The default value is Normal.
- Disable Saving — Check to prevent the user from saving, emailing and printing images.
- Display Metric — Check to display measurements in the metric system.
- Show Cameras with Images Only — Check if this user is allowed to view only cameras with images.
- Default Dashboard View — Select from the dropdown menu the dashboard (Auto, Full, Grid, List, Map, or Enterprise) that will be displayed first. The default value is Auto.
- View All Customer Cameras — Check if this user is allowed to view all the customer’s cameras.
- Show Active Cameras Only — Check if this user is allowed to view only active cameras.
- Show Completed Cameras Only — Check if this user is allowed to view only completed cameras.
- Save — Click to add the user.
Note: To add multiple users, visit our article on invite links.
Delete a User
Check the user in the User Accounts screen and click the Delete icon (trash can).
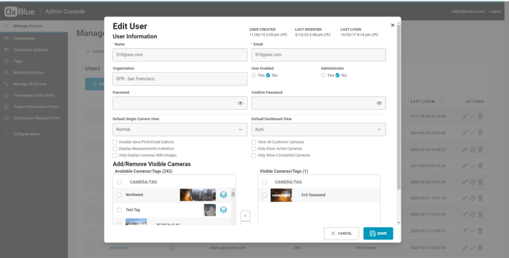
Edit a User
Click the name of the user or the Edit icon (pencil) in the User Accounts screen, then update the user’s data and click Save in the Edit User screen.
Add and Remove Access to Cameras
To move a camera or a tag from the Available Cameras/Tags column to the Visible Cameras/Tags column, click the camera or tag and then click one of the double arrows between the columns.
Enable or Disable a User
Click the user in the User Accounts screen, then click Enable or Disable.
Scheduled Updates
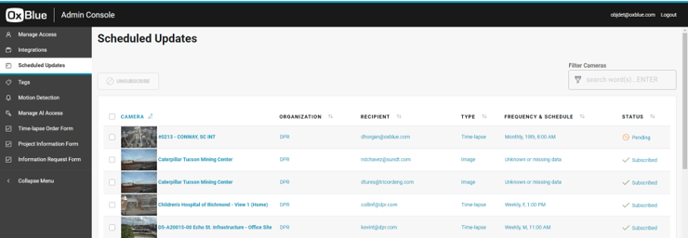
The scheduled updates tab enables administrators to see what updates users are receiving and unsubscribe them if necessary.